

How to install wall-mounted sensors for optimal energy efficiency and indoor air quality
Even the best quality measurement instruments for carbon dioxide, temperature, and humidity will provide inaccurate readings if they are not installed correctly. These installation tips for your wall-mounted sensors will help you ensure that people in your building benefit from fresh air, thermal comfort, and healthy humidity levels. When sensors are installed correctly, HVAC systems can respond more precisely to changing conditions – improving occupant well-being while reducing energy waste.
Why proper sensor placement matters
Poor sensor placement is one of the most common causes of inaccurate measurements. High-quality sensors can provide accurate long-term measurements – but only if they are installed correctly. Everything from nearby heat sources to mounting height can affect readings, leading to poor energy efficiency and sub-optimal indoor air quality. Knowing the installation mistakes to avoid will help you to provide your HVAC system with the best measurement data possible.
Where should you install wall-mounted sensors?
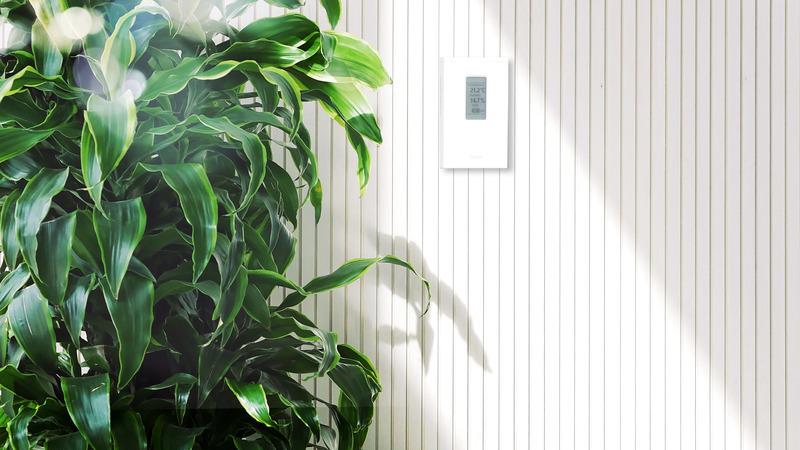
Wall-mounted sensors, also known as room or space sensors, play a crucial role in monitoring the conditions being experienced by the people in your building. As human comfort and safety are paramount for HVAC control decisions, proper sensor placement is essential to ensure accurate readings and optimal system performance.
Because you are controlling airflow and quality for the benefit of humans in a space, wall-mounted sensors should be positioned in a representative location where they experience the same conditions as people. It is important to pick a place with unrestricted airflow that has no nearby sources of thermal interference.
Measure what and where you want to control
For CO2 measurements it is particularly important to consider what and where you want to control. CO2 measurements reflect a building’s occupancy level so your HVAC system can provide optimal air quality. Because of this it is important to place the sensors roughly at breathing level – typically around one and a half meters from the ground – to accurately reflect the air quality people are experiencing. Placing your CO2 sensors any higher will give misleading readings as CO2 is heavier than air, so levels will be higher closer to the ground.
Vaisala Humidity and Temperature Transmitter Series HMW90
Let’s look at a real-world example. A convention center thought their new HVAC control system was working accurately because the CO2 sensors they had installed in the rafters showed acceptable levels. But when the CO2 was measured at floor level the concentration was alarmingly high. Placing your sensors where people will be breathing ensures you do not under or over ventilate your space.
Another common installation mistake is installing sensors in direct sunlight or close to a heat source, such a radiator or heating duct, or above a printer or photocopier. Basically, as with CO2, you want to make sure that you are measuring what people in the room are actually experiencing.
Ensure your sensors are oriented correctly
Wall-mounted sensors are designed to be mounted in a specific orientation. This is because both the sensors and the electronics are in the same housing, and even low-voltage electronics generate some heat. When installed correctly, this heat escapes through the top of the unit and fresh air naturally flows over the sensor, which is lower in the housing. If the sensor is mounted sideways or upside-down, heat cannot escape and the sensor will record a higher temperature reading and a lower humidity reading.
Heat is also an issue if you mount sensors above each other. Heat rising from the lower sensor can cause the one above to heat up, making readings inaccurate. For example, if you mount a temperature or humidity sensor above a carbon dioxide sensor you will get temperature readings that are too high or humidity readings that are too low. Make sure you either mount the sensors sufficiently far apart, or at least place the warmer sensor well above the other sensor.
Measurement errors from external factors
If you have sensors in a pressurized room, the pressure difference between the room and the wall cavity can be another source of error. This is because it can cause cold air, or air with low concentrations of CO2, to flow directly into the sensor unit via the wiring hole in the wall, which can significantly distort readings. To prevent this, you should seal the hole by either adding a backing plate to the sensor box or filling it with caulking.
Building materials can be another source of error, especially for CO2 sensors. For example, fresh concrete and certain types of plaster will absorb CO2 for some time, significantly lowering a room’s CO2 readings. Another potential issue can be using CO2 sensors with automatic background calibration (ABC) logic. This type of sensor applies a correction value to the assumed CO2 level, which can result in an artificially low reading. It is best to avoid this type of sensor.
Concrete and steel can also cause measurement errors due to their conductive properties. These materials are excellent conductors of heat, meaning they can act as a heat sink or heat source for any sensor that is mounted directly onto them. This makes temperature readings better represent the wall material rather than the air in the space being monitored. To counteract this, either mount the sensor on an interior wall or place an insulating material between the sensor and the wall.
Finally, if your space has a forced downward airflow, the measured temperature can be artificially raised as the heat cannot leave the sensor electronics effectively. You can counteract this effect by using a sensor that is designed for cleanrooms and other spaces with forced downward airflow. In these units the sensor is separated from the electronics to prevent heating while still ensuring sufficient contact with the environment.
11 tips for installing wall-mounted sensors
- Position sensors where they will experience the same conditions as room occupants.
- Ensure there is free-flowing air around the sensor.
- Make sure CO2 sensors are installed around one and a half meters from floor level.
- Do not position sensors near a heat source or in direct sunlight.
- Mount sensors with the correct orientation.
- Do not mount one sensor directly above another.
- Seal the wire feedthrough when installing sensors in pressurized rooms.
- Don’t install sensors onto fresh concrete or plaster.
- Avoid sensors that use automatic background calibration (ABC).
- Do not install sensors directly onto exterior walls made of concrete or steel.
- For rooms with forced downward airflow, use a sensor designed for this purpose.
Correct sensor installation is not just a technical detail – it is a key factor in maintaining healthy, comfortable indoor environments for the people who use your building every day.
Learn more about how sensor installation impacts energy efficiency and indoor air quality — and explore additional tips for installing duct-mounted and outdoor sensors in our related materials, including articles and expert webinars.
Further reading


Fit for demanding measurement needs
Vaisala delivers advanced HVAC transmitters that empower automation systems to perform flawlessly in the most demanding environments, from data centers and semiconductor fabs to cleanrooms, hospitals, and other critical spaces, ensuring precise, reliable measurements where they matter most.
Our transmitters offer superior reliability, easy installation, and seamless integration with major Building Automation and Building Management Systems. The comprehensive product range includes temperature, humidity, air pressure, dew point, and CO₂ for ambient air, pipes, ducts, and outdoor applications.